ISPConfig 是 Internet Service Provider Configuration 的首字母缩写词,是具有多服务器管理功能的多功能控制面板。它拥有用户友好的界面和开源的灵活性,使其成为初学者和经验丰富的管理员的理想选择。

在 Debian 上安装 ISPConfig 12 Bookworm
步骤 1。更新您的 Debian 12 系统,以确保您拥有最新的安全补丁和软件更新。执行以下命令:
sudo apt update
sudo apt upgrade
第2步。设置主机名。
现在确保设置了主机名:
sudo hostnamectl set-hostname ispconfig.idroot.us
在继续之前,我们将检查主机名是否正确:
hostname -f
输出:
root@idroot:~$ hostname -f
在继续之前,我们将检查主机名是否正确:
hostname -f
输出:
root@idroot:~$ hostname -f
idroot.example.com
第 3 步。安装必要的依赖项。
现在更新 Debian 12 软件库以包含非自由软件包:
sudo tee /etc/apt/sources.list<<EOF
deb http://deb.debian.org/debian bookworm main contrib non-free non-free-firmware
deb http://deb.debian.org/debian bookworm-updates main non-free contrib non-free-firmware
deb http://security.debian.org/debian-security bookworm-security main contrib non-free non-free-firmware
EOF
目前,ISPConfig 与 Debian 12 不兼容。因此,我们将对我们的安装程序进行调整,使我们的安装程序能够使用 Debian 11 软件包:/etc/os-release
sudo sed -i 's/12/11/g' /etc/os-release
源文件:
source /etc/os-release
请记住在安装完成后还原更改。
第 4 步。在 Debian 上安装 ISPConfig 12.
官方 ISPConfig 脚本安装程序简化了安装过程,并确保与最新功能和安全更新兼容。使用以下命令从 ISPConfig 官方网站获取脚本:
wget -O - https://get.ispconfig.org | sudo sh -s -- --help
输出:
ISPConfig 3 Autoinstaller
**********************************************************************************************************************************************************************************************

Usage: ispc3-ai.sh [<argument>] [...]

This script automatically installs all needed packages for an ISPConfig 3 setup using the guidelines from the "Perfect Server Setup" howtos on www.howtoforge.com.

Possible arguments are:
    --help          Show this help page
    --debug         Enable verbose logging (logs each command with the exit code)
    --channel       Choose the channel to use for ISPConfig. --channel=<stable|dev>
                    "stable" is the latest ISPConfig release available on www.ispconfig.org
                    "dev" is the latest dev-branch from the ISPConfig git repository: https://git.ispconfig.org/ispconfig/ispconfig3/tree/develop
                    -> The dev channel might contain bugs and less-tested features and should only be used in production by very experienced users.
    --lang          Use language for ISPConfig installation. Specify with --lang=en|de (only en (English) and de (German) supported currently).
    --interactive   Don't install ISPConfig in non-interactive mode. This is needed if you want to use expert mode, e. g. to install a slave server that shall be integrated into an existing
                    multiserver setup.
    --use-nginx     Use nginx webserver instead of apache2
    --use-amavis    Use amavis instead of rspamd for mail filtering
    --use-unbound   Use unbound instead of bind9 for local resolving. Only allowed if --no-dns is set.
    --use-php       Use specific PHP versions, comma separated, instead of installing multiple PHP, e.g. --use-php=7.4,8.0 (5.6, 7.0, 7.1, 7.2, 7.3, 7.4, 8.0 and 8.1 available).
                    --use-php=system disables the sury repository and just installs the system's default PHP version.
                    ommiting the argument (use all versions)
    --use-ftp-ports This option sets the passive port range for pure-ftpd. You have to specify the port range separated by hyphen, e. g. --use-ftp-ports=40110-40210.
                    If not provided the passive port range will not be configured.
    --use-certbot   Use Certbot instead of acme.sh for issuing Let's Encrypt certificates. Not adviced unless you are migrating from a old server that uses Certbot.
    --no-web        Do not use ISPConfig on this server to manage webserver setting and don't install nginx/apache or pureftpd. This will also prevent installing an ISPConfig UI and implies
                    --no-roundcube as well as --no-pma
    --no-mail       Do not use ISPConfig on this server to manage mailserver settings. This will install postfix for sending system mails, but not dovecot and not configure any settings for
                    ISPConfig mail. It implies --no-mailman.
......
执行安装程序时,多个配置选项将变为可用。在这种情况下,我们将选择 Apache、PHP 8、MariaDB、Postfix、Dovecot、Rspamd、BIND、Jailkit、Roundcube、PHPMyAdmin、Mailman、Webalizer、AWStats 和 GoAccess。
wget -O - https://get.ispconfig.org | sudo sh -s -- --use-php=8.0 --use-ftp-ports=40110-40210 --lang=en --unattended-upgrades
输出:
WARNING! This script will reconfigure your complete server!
It should be run on a freshly installed server and all current configuration that you have done will most likely be lost!
Type 'yes' if you really want to continue: yes
请记住在安装完成后修改以下文件:
sudo sed -i 's/11/12/g' /etc/os-release
第 5 步。配置防火墙。
在 Debian 上为 ISPConfig 配置防火墙对于确保只打开必要的端口、增强服务器的安全性至关重要。ISPConfig 使用端口 8080 作为其 Web 界面。允许此端口上的流量:
sudo ufw allow 8080/tcp
启用 UFW 以应用更改:
sudo ufw enable
验证 UFW 现在是否处于活动状态并正确配置:
sudo ufw status
第 6 步。访问 ISPConfig Web 界面。
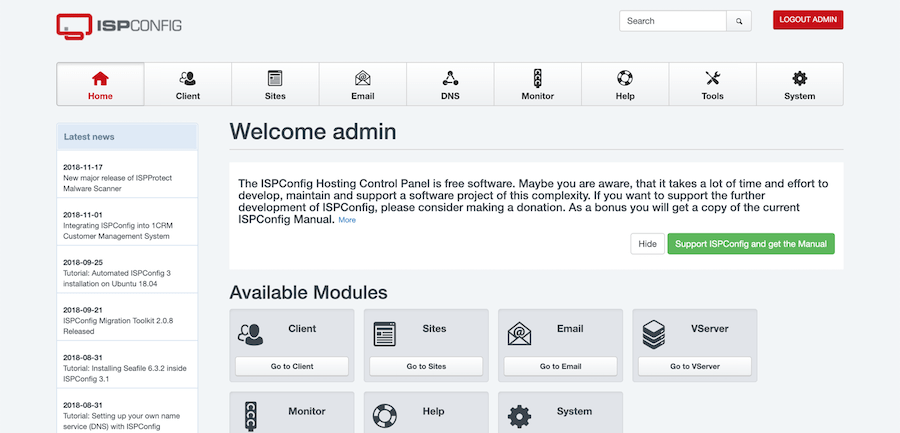
访问 ISPConfig Web 界面,网址为 。您将被重定向到 ISPConfig 登录页面:https://ispconfig.idroot.us:8080

感谢您使用本教程在 Debian 12 Bookworm 上安装最新版本的 ISPConfig。如需更多帮助或有用信息,我们建议您查看 ISPConfig 官方网站。
 33台词网
33台词网