Seafile能够跨设备存储和共享文件,并提供备份和同步功能,是企业和个人的热门选择。在Rocky Linux 9上使用Seafile的好处之一是操作系统附带的安全性。Rocky Linux 9 是一个社区驱动的企业级 Linux 发行版,强调稳定性和安全性。通过在 Rocky Linux 9 上托管 Seafile,您可以放心地知道您的文件存储在安全的平台上。

在 Rocky Linux 9 上安装 Seafile
第 1 步。首先,通过运行以下命令更新系统软件包:
sudo dnf update
sudo dnf install epel-release
第 2 步。安装海文件依赖项。
Seafile 是用 Python Django 框架编写的,你需要安装它的依赖项和 Python 包才能让它工作。运行以下命令以安装 Python 工具、Pip 包管理器、SQL 库和 Memcached:
sudo dnf install python3 python3-devel python3-imaging MySQL-python3 python3-simplejson python3-setuptools mariadb mariadb-server nginx gcc mysql-devel
接下来,使用 pip3 安装 Python 所需的模块:
sudo pip3 install --upgrade pip
sudo python3 -m pip install --upgrade Pillow
sudo pip3 install pylibmc captcha jinja2 django-pylibmc django-simple-captcha python3-ldap mysqlclient
sudo pip3 install future sqlalchemy==1.4.3
第 3 步。在 Rocky Linux 9 上安装 MariaDB 数据库。
默认情况下,MariaDB 在 Rocky Linux 9 基础存储库中可用。现在运行以下命令将最新的稳定版本的 MariaDB 安装到您的系统中:
sudo dnf install mariadb-server mariadb
安装完成后,启动 MariaDB 服务并通过运行以下命令使其在启动时自动启动:
sudo systemctl enable mariadb --now
sudo systemctl start mariadb
sudo systemctl status mariadb
要检查安装的 MariaDB 版本,请运行以下命令:
mariadb --version
默认情况下,MariaDB 未强化。您可以使用脚本保护 MariaDB。您应该仔细阅读并在每个步骤下方仔细阅读,这将设置root密码,删除匿名用户,禁止远程root登录,并删除测试数据库和对安全MariaDB的访问权限:mysql_secure_installation
mysql_secure_installation
像这样配置它:
- Set root password? [Y/n] y
- Remove anonymous users? [Y/n] y
- Disallow root login remotely? [Y/n] y
- Remove test database and access to it? [Y/n] y
- Reload privilege tables now? [Y/n] y
接下来,为Seafile主要组件创建数据库,即,和:ccnetseafileseahub
CREATE DATABASE ccnet_server;
CREATE DATABASE seahub_server;
CREATE DATABASE seafile_server;
然后创建一个数据库用户并授予他对数据库的权限:
CREATE USER 'seafile'@'localhost' IDENTIFIED BY 'your-strong-passwd';
接下来,授予他数据库的所有权限:
GRANT ALL PRIVILEGES ON ccnet_server.* TO 'seafile'@'localhost';
GRANT ALL PRIVILEGES ON seahub_server.* TO 'seafile'@'localhost';
GRANT ALL PRIVILEGES ON seafile_server.* TO 'seafile'@'localhost';
第 3 步。在 Rocky Linux 9 上安装 Seafile。
现在转到Seafile下载页面并获取Seafile最新版本的下载链接:
wget https://s3.eu-central-1.amazonaws.com/download.seadrive.org/seafile-server_10.0.1_x86-64.tar.gz
接下来,将 tar 文件解压缩到目录:/srv
sudo tar -xvf seafile-server_10.0.1_x86-64.tar.gz -C /srv
sudo mv /srv/seafile-server_10.0.1 /srv/seafile
运行安装脚本。无需安装,只需解压缩并运行安装脚本
cd /srv/seafile
sudo ./setup-seafile-mysql.sh
按照提示使用 MariaDB 设置您的 Seafile 服务器。
Checking python on this machine ...

-----------------------------------------------------------------
This script will guide you to setup your seafile server using MySQL.
Make sure you have read seafile server manual at

        https://download.seafile.com/published/seafile-manual/home.md

Press ENTER to continue
-----------------------------------------------------------------
接下来,通过为服务器提供一个名称(域名)来配置您的 Seafile 服务器:
What is the name of the server? It will be displayed on the client.
3 - 15 letters or digits
[ server name ] idroot

What is the ip or domain of the server?
For example: www.idroot.us, 192.168.1.101
[ This server's ip or domain ] seafile.idroot.us

Which port do you want to use for the seafile fileserver?
[ default "8082" ]
接下来,系统将要求您选择一种初始化 Seafile 数据库的方法:
-------------------------------------------------------
Please choose a way to initialize seafile databases:
-------------------------------------------------------

[1] Create new ccnet/seafile/seahub databases
[2] Use existing ccnet/seafile/seahub databases

[ 1 or 2 ] 2
接下来,系统将要求您输入 Seafile 的数据库详细信息:
What is the host of mysql server?
[ default "localhost" ]

What is the port of mysql server?
[ default "3306" ]

Which mysql user to use for seafile?
[ mysql user for seafile ] seafile

What is the password for mysql user "seafile"?
[ password for seafile ]

verifying password of user seafile ...  done

Enter the existing database name for ccnet:
[ ccnet database ] ccnet_server

verifying user "seafile" access to database ccnet_db ...  done

Enter the existing database name for seafile:
[ seafile database ] seafile_server

verifying user "seafile" access to database seafile_db ...  done

Enter the existing database name for seahub:
[ seahub database ] seahub_server

verifying user "seafile" access to database seahub_db ...  done
您将看到您的 Seafile 配置。按回车键继续安装:
---------------------------------
This is your configuration
---------------------------------

    server name:            idroot
    server ip/domain:       seafile.idroot.us

    seafile data dir:       /opt/seafile/seafile-data
    fileserver port:        8082

    database:               use existing
    ccnet database:         ccnet_server
    seafile database:       seafile_server
    seahub database:        seahub_server
    database user:          seafile


---------------------------------
Press ENTER to continue, or Ctrl-C to abort
---------------------------------
如果安装成功,您将看到以下屏幕:
Generating ccnet configuration ...

Generating seafile configuration ...

done
Generating seahub configuration ...

----------------------------------------
Now creating ccnet database tables ...

----------------------------------------
----------------------------------------
Now creating seafile database tables ...

----------------------------------------
----------------------------------------
Now creating seahub database tables ...

----------------------------------------

creating seafile-server-latest symbolic link ...  done

-----------------------------------------------------------------
Your seafile server configuration has been finished successfully.
-----------------------------------------------------------------

run seafile server:     ./seafile.sh { start | stop | restart }
run seahub  server:     ./seahub.sh  { start <port> | stop | restart <port> }

-----------------------------------------------------------------
If you are behind a firewall, remember to allow input/output of these tcp ports:
-----------------------------------------------------------------

port of seafile fileserver:   8082
port of seahub:               8000

When problems occur, Refer to

        https://download.seafile.com/published/seafile-manual/home.md

for information.
最后,启动 Seafile 服务器服务以帮助我们进行文件上传、文件下载和文件同步:
cd /srv/seafile/
sudo ./seafile.sh start
现在启动Seahub Web UI服务:
cd /srv/seafile/
sudo ./seahub.sh start
输出:
----------------------------------------
It's the first time you start the seafile server. Now let's create the admin account
----------------------------------------

What is the email for the admin account?
[ admin email ] ngadimin@idroot.us

What is the password for the admin account?
[ admin password ]

Enter the password again:
[ admin password again ]

----------------------------------------
Successfully created seafile admin
----------------------------------------

Seahub is started

Done.
第 4 步。创建海文件系统服务。
现在我们将Seafile和Seahub设置为服务:systemd
sudo tee  /etc/systemd/system/seafile.service<<EOF
[Unit]
Description=Seafile
After= mysql.service
After=network.target

[Service]
Type=forking
ExecStart=/srv/seafile-server-latest/seafile.sh start
ExecStop=/srv/seafile-server-latest/seafile.sh stop

[Install]
WantedBy=multi-user.target
EOF
为Seahub Web UI创建一个systemd单元文件:
sudo tee  /etc/systemd/system/seahub.service<<EOF
[Unit]
Description=Seafile
After= mysql.service
After=network.target

[Service]
Type=forking
ExecStart=/srv/seafile-server-latest/seahub.sh start
ExecStop=/srv/seafile-server-latest/seahub.sh stop

[Install]
WantedBy=multi-user.target
EOF
第5步。配置防火墙。
默认情况下,防火墙在 Rocky Linux 上启用。Seafile 的默认端口是端口号,而 Seahub 的默认端口是端口 。要允许端口通过防火墙,请发出以下命令:80828000
sudo firewall-cmd --zone=public --add-port=8000/tcp --permanent
sudo firewall-cmd --zone=public --add-port=8082/tcp --permanent
sudo firewall-cmd --reload
第 6 步。访问海文件网页界面。
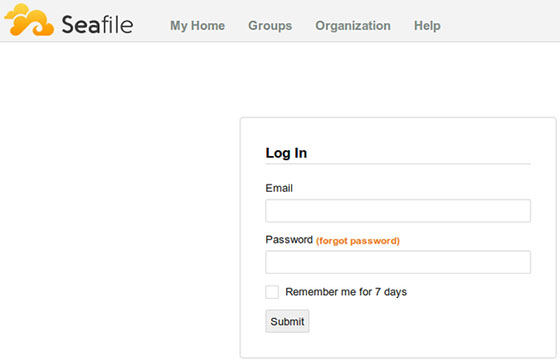
成功安装后,打开您的 Web 浏览器并使用 URL 访问 Seafile Web 界面。您应该看到以下页面:http://seafile.idroot.us:8000

感谢您使用本教程在您的 Rocky Linux 9 系统上安装 Seafile。如需其他帮助或有用信息,我们建议您查看官方 Seafile 网站。
 33台词网
33台词网